Showing posts with label Cake. Show all posts

Sunday, February 13, 2011

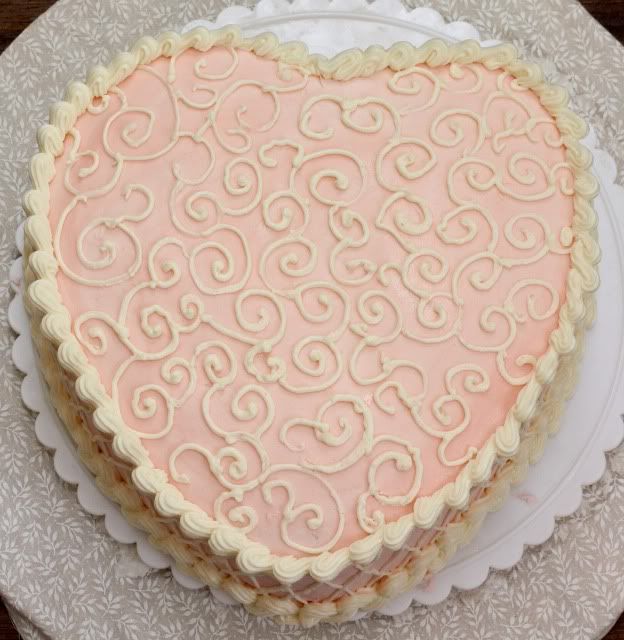
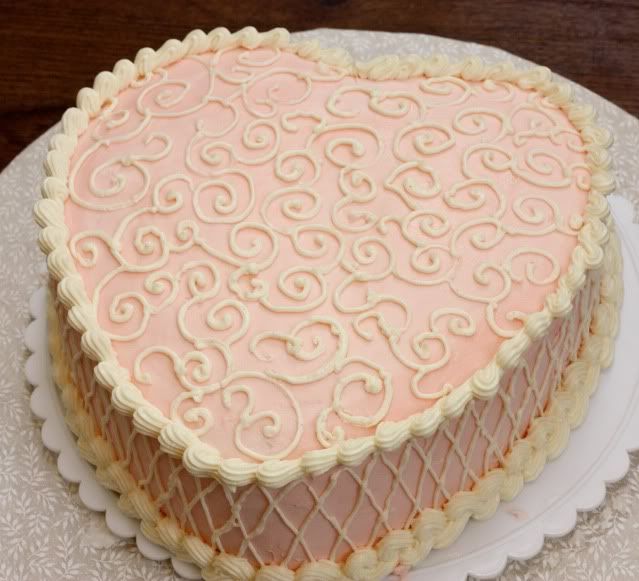
Valentine's Day Cake


It's been months since I've made a cake, so I decided to make one for Valentine's Day. I made a simple chocolate cake and filled it with whipped ganache and iced it in traditional vanilla butttercream. Can we say decadence?!

For the cake I used my favorite Hershey's Perfectly Chocolate Cake.

Whipped Ganache Cake Filling
Source: Martha Stewart

Ingredients
16 oz. semi sweet chocolate, chopped
2 1/2 cups heavy cream

Directions
*Note - I halved this recipe to fill one medium sized cake. It worked perfectly and was just enough to fill the cake with.

Place the semisweet chocolate in a large heat-proof bowl. Bring cream to a boil in heavy-bottom pan over medium-high heat; pour over the chocolate. Let sit for 10 minutes; use rubber spatula to stir until smooth.


Let chocolate mixture cool to room temperature, stirring occasionally. Place mixture in the bowl of an electric mixer fitted with a whisk attachment. Whip on medium speed until ganache holds its shape and is slightly lightened in color.


Easy Vanilla Buttercream
Source: Food Network

Ingredients

3 cups confectioners' sugar
1 cup butter
1 teaspoon vanilla extract
1 to 2 tablespoons whipping cream

Directions
*Note - I doubled this recipe which made a perfect amount to ice and decorate a medium cake.

In a standing mixer fitted with a whisk, mix together sugar and butter. Mix on low speed until well blended and then increase speed to medium and beat for another 3 minutes.

Add vanilla and cream and continue to beat on medium speed for 1 minute more, adding more cream if needed for spreading consistency.

Wednesday, February 9, 2011

Chocolate Cupcakes with Rapsberry Buttercream

One of my first pregnancy cravings was chocolate cake. Since I didn't have it in me to make an entire cake, I thought I'd do cupcakes and boy did they hit the spot! I used my favorite chocolate cake recipe and made a very simple buttercream to top them. I'd like to say I shared these, but I totally didn't. :)

Ingredients

Source for Cake- Hershey's
Source for Buttercream - Apple A Day

1 recipe chocolate cake, I used this one

20 TBSP (2 ½ sticks) unsalted butter, softened
2 ½ c. confectioners’ sugar, sifted
1/8 tsp. salt
1 TBSP raspbery liquer of 1 1/2 tsp. raspberry extract (I used the extract...obviously)
2 TBSP water, if necessary
gel food coloring, if desired


Directions

Make cupcakes as per recipe directions. Allow to cool completely before frosting.

For the Buttercream

1. In a stand mixer fitted with the whisk attachment, beat the butter at medium-high speed until smooth, about 20 seconds.

2. Add confectioners' sugar and salt. Beat at medium-low speed until most of the sugar is moistened, about 45 seconds. Scrape down the bowl and beat at medium speed until the mixture is fully combined, about 15 seconds.

3. Scrape bowl, add liquer or extract, and beat at medium speed until incorporated, about ten seconds. If using gel food color (I used a few drops of liquid food coloring) add at this time.

4. Increase the speed to medium-high and beat until light and fluffy, about four minutes, scraping down bowl once or twice. Add water to achieve desired consistency, if needed. Ice cupcakes as desired.

Tuesday, August 10, 2010

Fishing Cake


I made this cake for this past father's day, but it can easily be made for any special occasion! It's a marble cake that was made in a 13x9 pan. Then for the water, I used light blue buttercream and swirled in a darker blue for more depth. The grass was made of green buttercream, and the dock and fishing pole was made of gumpaste. The fish and other little sea-creatures were made of fondant. Overall this was a fun cake to make, and my dad and grandfather's really enjoyed it!

Tuesday, August 3, 2010

My 1st Wedding Cake


Well, I finally broke down and did it. I made my first ever wedding cake. It was sort of a last minute thing - I go to the bank every day for work and one of the teller's I talk with mentioned he was getting married in a few months and needed a cake. Well one thing led to another, I got in touch with his fiance (now wife!) and I ended up doing their cake! At first I was rather stressed (mainly about trying to cover the big bottom layer in fondant without it cracking) but I was really pleased with how it turned out!

And the best part about the whole experience was that the bride and groom loved the cake - how it looked and how it tasted! They've even referred me to some of their friends who are engaged!

So all in all, my 1st wedding cake was a success and I'm so glad I did it!

Wednesday, March 24, 2010

A Birthday Cake


Sometimes nothing says "Happy Birthday" better then a simply decorated, delicious birthday cake. With nice, smooth butter cream, a simple rope boarder and sweet little sugar flowers, the first thing your eye gravitates to is a message. A simple and meaningful "Happy Birthday."

This cake was made for my wonderful grandfather's 96th birthday. He is so sweet - always a positive spirit and get this: he still drives...well! With a full head of hair and a memory that is sharp as a tack, Grandpa was truly appreciative of this cake. He didn't believe me when I said I made it - he insisted that I bought it at a bakery!

Also - I decided to post this cake because at this time last year I made grandpa's 95th birthday cake. After I made that cake, I decided to take the Wilton classes. So I urge you to look back at this post and take a look at that cake. 1 year, 16 Wilton classes and countless cakes later I am very pleased with my improvement and again can't say enough about how great the Wilton classes are.

Monday, February 8, 2010

Guinness Chocolate Cupcakes with Baileys Irish Buttercream


I can't believe it, but my little baby brother just celebrated his 21st birthday. I guess he's not so little anymore. To celebrate this milestone birthday, I had to bake him some cupcakes. But not just any cupcakes...spiked cupcakes of course. I mean, what's a big sister for?!

I brought these to work in celebration of Kevin's birthday (we both work at the same place) and he and our coworkers just loved them. Last count...Kevin ate 4 with Jimmy coming in at 3. These were gone in a flash and everyone raved.

The Guinness pretty much bakes out of the cupcake itself, but leaves you with a super-moist, perfectly flavored chocolate cake. The buttercream is delicious...Great consistency and flavor with the Bailey's definitely at the forefront. I skipped the ganache portion of this cupcake, simply from lack of time and from the fact that I didn't want these to be TOO boozy since I was bringing them to work! (If you want the recipe with the ganache, head over to Smitten Kitchen) But even without the ganache, these were delicious. I already have requests to make them again!

Ingredients
Adapted from Smitten Kitchen

For the Guinness Chocolate Cupcakes

1 cup Guinness
1 cup (2 sticks) unsalted butter
3/4 cup unsweetened cocoa powder (preferably Dutch-process)
2 cups all purpose flour
2 cups sugar
1 1/2 teaspoons baking soda
3/4 teaspoon salt
2 large eggs
2/3 cup sour cream (I used light)

Baileys Irish Buttercream
3 to 4 cups confections sugar (I used about 3.5 cups)
1 stick (1/2 cup or 4 ounces) unsalted butter, at room temperature
3 to 4 tablespoons Baileys Irish Cream (I used 3 tbsp Bailey's and 1 tbsp milk to get it to the right consistency)

Directions

Preheat oven to 350°F. Line 24 cupcake cups with liners. In a saucepan over medium heat, melt butter and add Guinness. Bring to a simmer. Whisk in cocoa powder until mixture is smooth. Set aside to cool slightly.

In a large bowl stir together flour, sugar, baking soda, and 3/4 teaspoon salt. In the bowl of a stand mixer fitted with the paddle attachment, beat eggs and sour cream until thoroughly combined. On low speed, drizzle in Guinness-chocolate mixture and beat just to combine. Add flour mixture, a little at a time, and mix briefly on slow speed just until the mixture comes together. Using rubber spatula, fold batter until completely combined. Divide batter among cupcake liners, filling them 2/3 to 3/4 of the way. Bake cake until toothpick inserted into center comes out clean, rotating them once front to back if your oven bakes unevenly, about 17 minutes. Cool cupcakes on a rack completely. (I always bake my cupcakes and cakes the day before I frost them which always works out well for me).

To make the buttercream, whip the butter in the bowl of a stand mixer fitted with the paddle attachment (I use this. I don't know if I've ever mentioned this before, but this product is amazing and SO WORTH IT. If you're debating on buying it or not, I HIGHLY suggest you do. I honestly can't remember the last time I used my "actual" paddle attachment since I bought this) for several minutes until the butter is very light and fluffy. Slowly add the powdered sugar, a few tablespoons at a time.

When the frosting looks thick enough to spread, drizzle in the Baileys (or milk) and whip it until combined. If this has made the frosting too thin (it shouldn’t, but just in case) beat in another spoonful or two of powdered sugar.

Ice and decorate the cupcakes.

Tuesday, January 12, 2010

Bête noire


For as long as I can remember, this has been my absolute favorite dessert. Since my mom and dad brought me to a wonderful local French restaurant when I was just a girl, I just couldn't get enough bête noire. It's rich, dense and oh so chocolatey. Never did I think it was something I could make at home.

But I attempted it for a recent dinner party I hosted and I am SO glad I did!!! This amazing flourless chocolate cake was just perfect and just like I remember. You can also make this dessert up to two days ahead which is great for when you are entertaining. It it just so indulgent, and certainly a dessert to impress.

Ingredients
Source: Epicurious, Originally from Bon Appétit, September 2006

Cake
1 cup water
3/4 cup sugar

9 tablespoons (1 stick plus 1 tablespoon) unsalted butter, diced
18 ounces bittersweet (not unsweetened) or semisweet chocolate, chopped (I used semisweet)
6 large eggs

Ganache
1 cup heavy whipping cream
8 ounces bittersweet (not unsweetened) or semisweet chocolate, chopped (I used semisweet)

Directions

For cake:
Preheat oven to 350°F. Butter 10-inch-diameter springform pan. Line bottom of pan with parchment round; butter parchment. Wrap 3 layers of heavy-duty foil around outside of pan, bringing foil to top of rim. Combine 1 cup water and sugar in small saucepan. Bring to boil over medium heat, stirring until sugar dissolves. Simmer 5 minutes. Remove from heat.

Melt butter in large saucepan over low heat. Add chocolate and whisk until smooth. Whisk sugar syrup into chocolate; cool slightly. Add eggs to chocolate mixture and whisk until well blended. Pour batter into prepared pan. Place cake pan in large roasting pan. Add enough hot water to roasting pan to come halfway up sides of cake pan.

Bake cake until center no longer moves when pan is gently shaken, about 50 minutes. Remove from water bath; transfer to rack. Cool completely in pan.

For ganache:
Bring whipping cream to simmer in small saucepan over medium heat. Remove from heat. Add chocolate and whisk until smooth. Pour over top of cake still in pan. Gently shake pan to distribute ganache evenly over top of cake. Refrigerate cake in pan until ganache is set, about 2 hours. DO AHEAD: Can be made 2 days ahead. Cover and keep refrigerated.

Run knife around pan sides to loosen cake; release sides. Cut cake into wedges and serve with whipped cream.

Thursday, December 17, 2009

Gingerbread Cake with Creamy Gingerbread Frosting


When looking for the perfect cake recipe for a holiday brunch, I found this Gingerbread Cake and thought it would be great and it certainly was. This was a great recipe. It was mildly spicy and the frosting was creamy and delicious with just a hint of ginger and spice.

Some things I found when making this recipe though, was that I probably shouldn't have covered the cake in fondant. The frosting was too smooth and sort of squished out the bottom of the cake. Also, I served this cake two days after I made it and while my guests thought it was great, I thought it was a bit on the dry side...but that was my fault.

Overall I thought this was a great recipe and one that I will definitely make again!

Ingredients
Source: McCormick

2 1/2 cups flour

2 teaspoons baking powder

2 teaspoons Ginger, Ground

1 teaspoon baking soda

1 teaspoon Cinnamon, Ground

1/2 cup (1 stick) butter, softened

1/2 cup firmly packed brown sugar

1 cup molasses

2 eggs

1 cup boiling water

Creamy Gingerbread Frosting (recipe follows)


Directions

1. Preheat oven to 350°F. Grease and flour 2 (9-inch) round cake pans. Mix flour, baking powder, ginger, baking soda and cinnamon in medium bowl; set aside.

2. Beat butter, brown sugar and molasses in large bowl with electric mixer on medium speed until well mixed. Add eggs; beat well. Add flour mixture alternately with boiling water, beating on low speed after each addition until smooth. Pour into prepared pans.

3. Bake 18 to 20 minutes or until toothpick inserted in center comes out clean. Cool in pans 10 minutes. Remove from pans; cool completely on wire rack.

4. Fill and frost with Creamy Gingerbread Frosting. Refrigerate cake until ready to serve.

Tips

Creamy Gingerbread Frosting: Pour 1 cup milk into medium bowl. Add 1 package (4-serving size) vanilla instant pudding mix, 1/2 teaspoon McCormick® Ground Ginger and 1/8 teaspoon McCormick® Ground Cinnamon . Beat with wire whisk 2 minutes. Gently stir in 1 tub (8 ounces) frozen whipped topping, thawed.

Tuesday, December 15, 2009

A Snowflake Cake


This past weekend I hosted a holiday brunch for some close family and friends. And of course, I had to make a cake. This was a gingerbread cake with creamy gingerbread frosting. The whole thing was topped in homemade fondant and the snowflakes were piped on the cake freehand with royal icing. I chose to use the rope boarder for the bottom, which I also did in royal icing.

If you're wondering why there is a big space at the top of the cake, that's because there was *supposed* to be a cake topper up there. I made a snowflake out of royal using the color flow technique however it was just too delicate and fell apart as I was taking it off the wax paper. Ahhh well, live and learn.

Besides the cake topper incident I was very pleased with the cake and had SO much fun making the snowflakes. After all, I am one of those rare breed of people who LOVES the snow and loved making my cake look all snowy! And, as I served this cake, snow started falling from the sky in droves which made for quite the conversation starter!

Monday, October 26, 2009

Pea Pod Baby Shower Cake & Cookies


A month or two ago, a family friend asked if I would do a cake for her daughter's upcoming baby shower. The theme of the shower was "A Pea in a Pod" which gave me a lot to work with. However I was nervous at first since this would be the first cake that I would do for someone other then family, and the first one that I'd actually get paid for.

But the cake ended up coming out great and the proud mom and grandmother to be were just so happy and pleased with the end result which made the labor and stress totally worth it. To see the smiles on their faces and their continual praise upon seeing the cake made me feel so beyond happy I can't even express it. I'm so glad they provided me with the opportunity to do my first "real" cake and am grateful that they loved it just as much as I loved making it.

The cake was an almond scented white cake with fresh raspberry filling. I topped that with homemade butter cream and homemade fondant. I made the pea pods out of fondant and the cake topper was also made of fondant (I added in some gum tex to strengthen it).

This was such a fun cake to do and again I was so happy that the mom-to-be loved it!

Monday, October 12, 2009

Autumn Leaves Cake


Over the weekend my family and I joined together in celebration of my aunt and uncle's 40th wedding anniversary. My cousin hosted the beautiful party at her house and of course I supplied the cake. Since my aunt and uncle love the fall, I decided to decorate the cake around this beautiful season.

The cake is frosted with chocolate buttercream since my aunt doesn't like fondant (even the homemade stuff!) so of course I would have loved to have gotten it smoother but I just did the best I could and used swiss dots for more visual interest. The leaves were made of fondant and cut out with leaf cookie cutters and then dusted with gold luster dust. I also arranged extra leaves on the cake table at the party.

The party was so much fun and of course my aunt and uncle loved the cake (they even fed each other the first slice of the cake just like they did at their wedding! Awww...)

Tuesday, September 8, 2009

Anniversary Cake


This past weekend my family and I got together in celebration of my parent's 35th wedding anniversary. I had a small party at my house, and the cooking and entertaining was fun of course, but the biggest part of the weekend (for me at least) was giving them their anniversary cake!

I had it planned for weeks, and watching it come to life was really fun. This was the 1st 3-tiered wedding type cake I've done, so I was admittedly (very) nervous about it, but all in all it came out great and wasn't as hard as I thought!

I did two layers of chocolate cake (one filled with raspberry jam, the other with hazelnut chocolate frosting) and one layer of spice cake filled with blackberries (recipe is forthcoming!) and topped the whole thing with buttercream and homemade marshmallow fondant. The calla lillies, leaves, and "35" on top of the cake were made of gumpaste and brushed with silver luster dust.

In terms of assembling the cake, I just placed each cake on top of a piece of cardboard exactly the size of the cake that sat on it, and placed one wooden dowel in the center of all the cakes (make sure you cut a whole in the center of the cardboard before you put the cake on!) so they didn't slide from side to side. Then on the bottom and middle layers, I studded the cakes with wooden dowels the exact height of the cake to support the layer above it.

The cake was a success, and my parents were very appreciative of it and the party!

Tuesday, July 28, 2009

Wilton Fondant & Gumpaste Course, Class 4


Last Sunday marked my final class of the Wilton cake decorating course. It's a little sad, I really enjoyed all of the classes. But I feel like I learned so much which is really exciting!

For the last class, I played around with some of my new fondant tools which was fun, and made some gum paste daisies which I think are just the cutest!

If you are thinking about taking the Wilton classes, I really suggest that you do. I can't believe how much I learned and how I can apply the techniques to many different things. I know cake decorating will be a skill that I can use for many, many years to come so in my opinion it's most certainly worth the money on the classes.

Friday, July 17, 2009

A Rainbow Cake!


Since I saw this cake featured on the Omnomicon blog, I have been hoping for an occasion to make it. Most cakes I make don't really scream "rainbow cake," but finally I found an occasion to make it! In the second class of Wilton's Fondant and Gum Paste course, you make a "sampler" cake. You learn how to drape, make garlands and a pretty handkerchief technique. So since the outside of the cake is sort of a mish-mash, I thought the inside could be fun as well! For really awesomely detailed instructions, head over to the Omnomicon blog. Besides making a boat load of dishes, it's really very easy to make. I did use boxed mix just because I wanted the batter to be perfectly white when I started. I also didn't really care about fat-content because I was making this for my co-workers, so I just followed the directions on the box. In addition, I used only egg whites and I used Wilton gel coloring for the rainbow-ing. I iced the cake in traditional buttercream topped with fondant, and the center is chocolate buttercream.

Whatever occasion you choose to make this cake for, enjoy! It will put a smile on everyone's face and you will certainly get the question..."How did you do that?!"


Monday, June 29, 2009

Wilton Course 3, Class 4 (Final Cake)


Well this was by far my favorite class (don't I say that after every Wilton class?!) I had such a ball doing a 2 tiered cake and really having the reins to create exactly what I wanted. I had an idea in my head about what I wanted to do for class for a week or so, but didn't know how everything would come together until I got to class. This class gave me a ton of confidence, and I'm really glad I've been through the 1st 3 courses. Not everything came out perfect (my fondant got wrinkled in some places and my string work wasn't the best), but overall I'm very pleased with it.

Next week I start the Fondant and Gum Paste course (our teacher calls it Course 4 but she says she's not supposed to call it that!) and I'm really excited for that one as well!

Monday, June 22, 2009

Father's Day Golf Cake


Now that I have gained some new skills from my Wilton Classes, I decided to attempt making my dad a father's day cake without a pattern or anything from class. My dad loves to golf, and since this is prime golfing season I thought the cake would be fitting.

I iced the sides of the cake in white buttercream and the top in a mixture of green and a bit of yellow. The "grass" is moss green and a bit of black. The "sand" is regular granulated sugar dyed ivory and yellow (in the blender), and the pebbles are made from fondant. The tee sign (I think that's what it's called?!) is fondant on a piece of spaghetti I dyed brown.

This was such a fun cake to make and my dad was SO impressed!
 

blogger templates | Make Money Online