
Showing posts with label Thanksgiving. Show all posts

Thursday, November 19, 2009

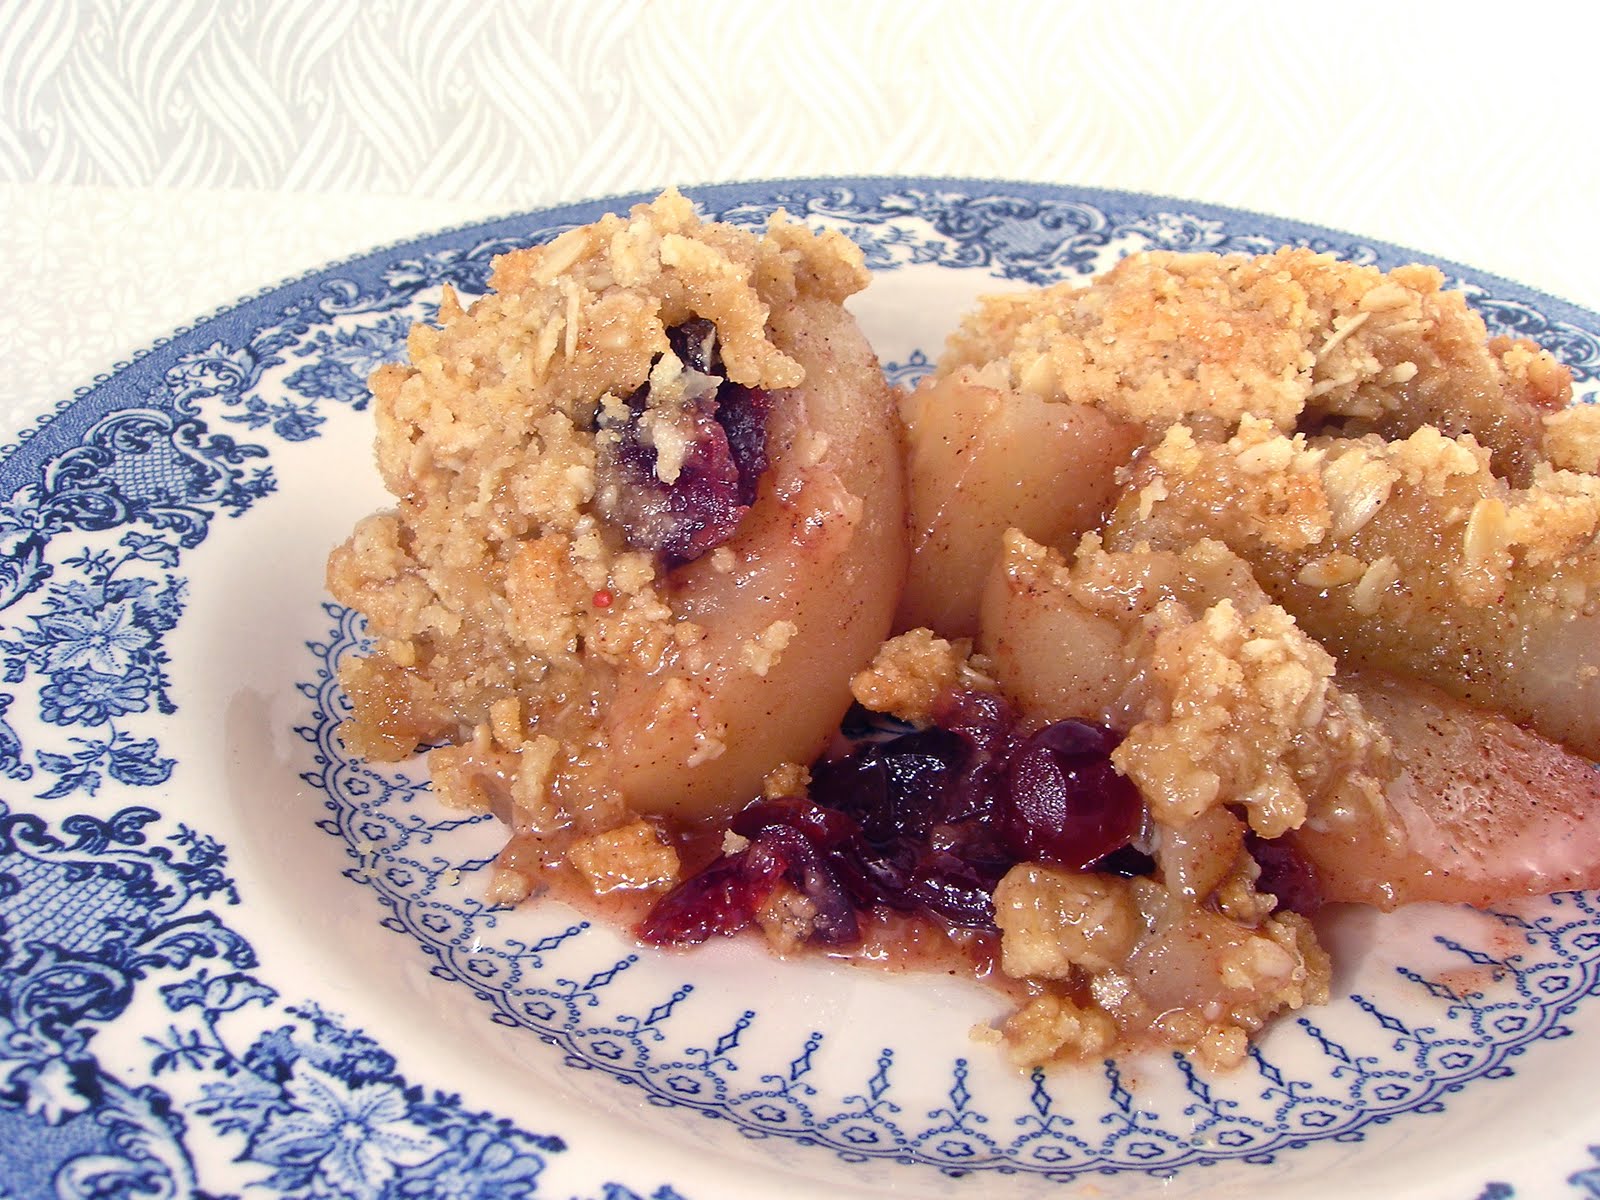
Cranberry Pear Crisp


After impulsively buying some beautiful Bosc pears at the farmers market, I got home and realized I had no idea what to do with them. So I asked my friend Julie for some suggestions (and because she is awesome at finding recipes) and decided to start with Ina Garten's Pear and Apple crisp as a starting point, but I forgot to print the recipe. So when I got home I just winged it and ended up with a surprisingly delicious crisp.

This is a great modification of a traditional apple crisp. The pear is a very welcome change, both texturally and taste wise. The cranberries add beautiful color and the thick topping is always a favorite. This crisp is great straight out of the oven or the day after. This would be a lovely dessert to display on your Thanksgiving dessert table.

Ingredients
Adapted from Ina Garten

Filling
6-8 Ripe Bosc Pears
1/4 cup granulated sugar
3/4 cup Crasins
1 tsp cinnamon
1/2 tsp allspice
1/4 tsp ground nutmeg
1 1/2 tsp. pure vanilla extract

Topping
1 1/2 cups flour
3/4 cup granulated sugar
3/4 cup light brown sugar, packed
1/2 tsp kosher salt
1 cup oatmeal
1/2 pound cold unsalted butter, diced

Directions
Preheat oven to 350 degrees and grease an 11x7 baking dish.

Peel, core and cut the pears into medium sized wedges. Add pears to a large bowl. Sprinkle the vanilla extract over the pears and toss to coat. Add sugar, cinnamon, allspice, nutmeg and crasins. Pour into baking dish and set aside.

In the bowl of a stand mixer fitted with the paddle attachment, combine flour, granulated sugar, brown sugar, salt, oatmeal and cold butter. Mix on low speed until the mixture is crumbly and the butter is the size of peas. Scatter evenly over the pear mixture.

Place the crisp on a baking sheet and bake for one hour until the pears are bubbly. If the topping starts to get too brown, place a large baking sheet on a rack over the crisp to prevent burning.

Wednesday, October 7, 2009

Stuffed Acorn Squash


I got the idea for this meal last year from a co worker who says this is how she prepares her acorn squash. It sounded like a perfect fall side dish. So I tried it last year and have made it many, many, many times since then (so it's tried and true).

If thanksgiving was one dish, this would be it. The delicious Acorn squash mixed with the comforting flavors on classic stuffing make for a hearty side that everyone will love. This is certainly a treat that is perfect for this time of year!

Ingredients
Inspiration for idea: My Coworker
Source of Classic Stuffing Recipe: Martha Stewart

1 acorn squash, cut in half with seeds removed
1 tbsp butter
1 tbsp brown sugar
1/2 onion, chopped
1 celery stalk, chopped
2-3 tbsp. unsalted butter
4 fresh sage leaves, minced
Aprox. 2 cups chicken stock
2-3 big thick slices of homemade french bread (you'll need more bread if you have thin slices) and cut into 1 inch cubes
salt
pepper

Directions
Preheat oven to 400 degrees and line a baking sheet with foil. Make sure squash will stand up straight (hollowed-side up) without tipping over. If it does, cut off the tip of the bottom until it will stand up. Place on baking sheet. Using a fork, poke a few small holes into the hollowed section of the squash. Place 1/2 tbsp of butter and brown sugar on both halves of squash. Set aside.

In a medium saucepan, melt the butter over medium heat. Add onions and celery and cook until tender and onions are translucent (about 5-10 minutes). Add sage and stir to combine, cook about 3-4 minutes. Add 1/2 cup of chicken stock and cook until reduced by half, about 5 minutes.

In a large bowl add onion/celery mixture, bread, and more chicken stock. I honestly never measure the chicken stock so 1 1/2 cups (after the 1/2 cup already used) is just an approximation. Just add a little bit at a time until the bread has soaked up most of the liquid. Add salt and pepper to taste.

Stuff stuffing into your acorn squash until completely filled up. Put into oven and bake for 1 hour. Check the stuffing after about 20 minutes until the end of cook time. If the stuffing looks like it's getting two brown I simply put an empty sheet pan on the rack above the squash which prevents burning. Serve hot.

Monday, December 1, 2008

Butternut Squash and Caramelized Onion Galette


Another fantastic recipe from the Good Things Catered Blog. I knew I wanted to have squash at Thanksgiving but again I wanted to switch it up this year. When I saw this it just looked amazing and let me tell you it was! Everyone at Thanksgiving raved over this tart and 3 of my cousins asked me for the recipe. Even my husband, who is on the picky side, said this was just amazing (and he doesn't lie about food!). One thing that I did not realize about this recipe until I made is was that it makes 2 tarts...so keep that in mind! However, we had 16 people for Thanksgiving, and both tarts were completely gone at the end of the meal...no leftovers! So I'm really glad I made the 2! I also refrigerated the filling overnight and it worked out perfectly. All I had to do on Thanksgiving was assemble the dough, put the filling in the tart and bake! So easy & delish!

Ingredients:
2 1/2 c. all-purpose flour
1/2 tsp salt
16 Tbsp (2 sticks) unsalted butter, cut into pieces
1/2 c. sour cream
1 Tbsp fresh lemon juice
1/2 c. ice water
1 large butternut squash (about 3lbs)
2 Tbsp olive oil
1 to 2 Tbsp butter (if you have only non-stick, the smaller amount will do)
2 sweet onions, halved and thinly sliced in half-moons
1 Tbsp balsamic vinegar
1 tsp salt
Pinch of sugar
1/4 tsp cayenne, or to taste
1 1/2 c. fontina cheese, cut into small cubes
2 tsp herbs de provence

Directions:
-In a large bowl, combine the flour and salt.
-In a smaller bowl, place butter pieces.
-Place both bowls in the freezer for 1 hour.
-Remove the bowls from the freezer and make a well in the center of the flour.
-Add the butter to the well and, using a pastry blender, cut it in until the mixture resembles coarse meal.
-Make another well in the center.
-In a small bowl, whisk together the sour cream, lemon juice and water and add sour cream mixture to the well.
-With your fingertips, mix in the liquid until large lumps form.
-Pat the lumps into a ball; do not overwork the dough.
-Cover with plastic wrap and refrigerate for 1 hour (or overnight, as I did).
-Preheat oven to 375 degrees and line baking sheet with foil.
-Halve, seed, and cut into 1/2-inch pieces, removing skin.
-Toss pieces with olive oil and a half-teaspoon of the salt and roast on baking sheet for 30 minutes or until pieces are tender.
-Set aside to cool slightly.
-Meanwhile, melt butter in a heavy skillet and cook onion over low heat with the remaining half-teaspoon of salt and pinch of sugar, stirring occasionally, until soft and lightly golden brown, about 20 minutes.
-Add balsamic vinegar and cayenne,, stirring to combine and cooking down.
-Remove from heat and set aside.
-Mix squash, caramelized onions, cheese and herbs together in a bowl (this is where I refrigerated overnight).
-Raise the oven temperature to 400 degrees.
-On a floured work surface, halve the dough and roll each half out into a 12-inch round.
-Transfer to an ungreased baking sheet.
-Spread half of squash, onions, cheese and herb mixture over the dough, leaving a 1 1/2-inch border.
-Fold the border over the squash, onion and cheese mixture, pleating the edge to make it fit.
-Bake until golden brown, 30 to 40 minutes.
-Remove from the oven, let stand for 5 minutes, then slide the galette onto a serving plate.
-Cut into wedges and serve hot, warm or at room temperature.

Pear and Cranberry Pie


I got this recipe from the Good Things Catered blog. It's a great blog, and a great recipe! As soon as I saw it, I knew I wanted to make that for Thanksgiving because it's different from the traditional "pumpkin pie". This was a great pie! The directions were very clear and easy to follow and the pears with the cranberries worked out very well together. Plus, it made me a pear convert. I hated pears until I made this pie! And not only does it taste great, it's just too pretty!

Ingredients:
1 recipe sweet pie dough
5 large, ripe green or red skinned pears
1 1/4 c. fresh cranberries
1/3 c. granulated sugar
3 Tbsp cornstarch
1/4 tsp fresh grated nutmeg
1 tsp zest of orange
2 Tbsp water
1 Tbsp raw sugar (I used granulated)
1 Tbsp beaten egg

Directions:
-Preheat oven to 375 degrees.
-Roll out 1/2 recipe of pie dough and place into deep pie dish, trimming edges.
-Place prepared pie dish into fridge
-Core and slice pears thin and place into large bowl with cranberries.
-In small bowl, combine sugar, cornstarch, nutmeg, orange zest, and water.
-Stir to combine well and pour over pear and cranberries.
-Toss mixture until all pieces are coated well.
-Remove pie dish from fridge and fill with fruit mixture (you can pour half in and then use remaining half to form a decorative top, as shown.)
-With remaining pie dough, cut out decorative edge and place around edge of pie.
-Brush edges with egg mixture and cover pie loosely with foil.
-Place into the oven and bake for 40 minutes.
-Remove foil from top, sprinkle with raw sugar and continue to bake, uncovered, for an additional 20 minutes.
-Remove from oven and let cool completely before serving.

Roast Turkey

Well Thanksgiving is done and over! It was a great time and all my food came out great. It was especially wonderful to spend time with our families. So I'll post a few Thanksgiving recipes since many of them can be used throughout the year. Enjoy!

This recipe comes from Martha Stewart. This is the 4th year I've used it and I've never been disappointed. It's a great recipe that I will be using many more years, since everyone (including me) just loves it!!

Ingredients

Serves 12 to 14

  • 1 twenty- to-twenty-one-pound fresh whole turkey, giblets and neck removed from cavity and reserved
  • 1 1/2 cups (3 sticks) unsalted butter, melted, plus 4 tablespoons unsalted butter, room temperature
  • 1 750-ml bottle dry white wine
  • 2 teaspoons salt
  • 2 teaspoons freshly ground black pepper
  • Classic Stuffing
  • 1 cup dry red or white wine, for gravy (optional)
  • Giblet Stock

Directions

  1. Rinse turkey with cool water, and dry with paper towels. Let stand for 2 hours at room temperature.
  2. Place rack on lowest level in oven. Heat oven to 450 degrees. Combine melted butter and white wine in a bowl. Fold a large piece of cheesecloth into quarters and cut it into a 17-inch, four-layer square. Immerse cheesecloth in the butter and wine; let soak.
  3. Place turkey, breast side up, on a roasting rack in a heavy metal roasting pan. If the turkey comes with a pop-up timer, remove it; an instant-read thermometer is a much more accurate indication of doneness. Fold wing tips under turkey. Sprinkle 1/2 teaspoon each salt and pepper inside turkey. Fill large cavity and neck cavity loosely with as much stuffing as they hold comfortably; do not pack tightly. (Cook remaining stuffing in a buttered baking dish for 45 minutes at 375 degrees.) Tie legs together loosely with kitchen string (a bow will be easy to untie later). Fold neck flap under, and secure with toothpicks. Rub turkey with the softened butter, and sprinkle with remaining 1 1/2 teaspoons salt and pepper.
  4. Lift cheesecloth out of liquid, and squeeze it slightly, leaving it very damp. Spread it evenly over the breast and about halfway down the sides of the turkey; it can cover some of the leg area. Place turkey, legs first, in oven. Cook for 30 minutes. Using a pastry brush, baste cheesecloth and exposed parts of turkey with butter and wine. Reduce oven temperature to 350 degrees. and continue to cook for 2 1/2 more hours, basting every 30 minutes and watching pan juices; if the pan gets too full, spoon out juices, reserving them for gravy.
  5. After this third hour of cooking, carefully remove and discard cheesecloth. Turn roasting pan so that the breast is facing the back of the oven. Baste turkey with pan juices. If there are not enough juices, continue to use butter and wine. The skin gets fragile as it browns, so baste carefully. Cook 1 more hour, basting after 30 minutes.
  6. After this fourth hour of cooking, insert an instant-read thermometer into the thickest part of the thigh. Do not poke into a bone. The temperature should reach 180 degrees.(stuffing should be between 140 degrees.and 160 degrees. and the turkey should be golden brown. The breast does not need to be checked for temperature. If legs are not yet fully cooked, baste turkey, return to oven, and cook another 20 to 30 minutes.
  7. When fully cooked, transfer turkey to a serving platter, and let rest for about 30 minutes. Meanwhile, make the gravy. Pour all the pan juices into a glass measuring cup. Let stand until grease rises to the surface, about 10 minutes, then skim it off. Meanwhile, place roasting pan over medium-high heat. Add 1 cup dry red or white wine, or water, to the pan. Using a wooden spoon, scrape the pan until liquid boils and all the crisp bits are unstuck from pan. Add giblet stock to pan. Stir well, and bring back to a boil. Cook until liquid has reduced by half, about 10 minutes. Add the defatted pan juices, and cook over medium-high heat 10 minutes more. You will have about 2 1/2 cups of gravy. Season to taste, strain into a warm gravy boat, and serve with turkey.
 

blogger templates | Make Money Online