Sunday, February 13, 2011

Valentine's Day Cake


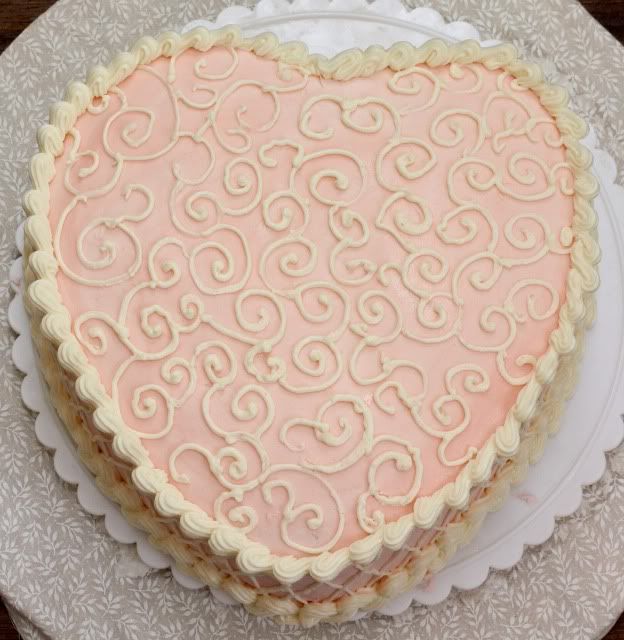
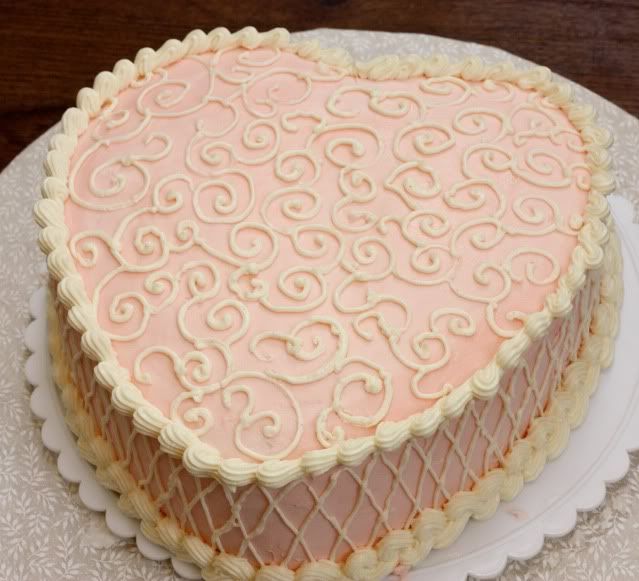
It's been months since I've made a cake, so I decided to make one for Valentine's Day. I made a simple chocolate cake and filled it with whipped ganache and iced it in traditional vanilla butttercream. Can we say decadence?!

For the cake I used my favorite Hershey's Perfectly Chocolate Cake.

Whipped Ganache Cake Filling
Source: Martha Stewart

Ingredients
16 oz. semi sweet chocolate, chopped
2 1/2 cups heavy cream

Directions
*Note - I halved this recipe to fill one medium sized cake. It worked perfectly and was just enough to fill the cake with.

Place the semisweet chocolate in a large heat-proof bowl. Bring cream to a boil in heavy-bottom pan over medium-high heat; pour over the chocolate. Let sit for 10 minutes; use rubber spatula to stir until smooth.


Let chocolate mixture cool to room temperature, stirring occasionally. Place mixture in the bowl of an electric mixer fitted with a whisk attachment. Whip on medium speed until ganache holds its shape and is slightly lightened in color.


Easy Vanilla Buttercream
Source: Food Network

Ingredients

3 cups confectioners' sugar
1 cup butter
1 teaspoon vanilla extract
1 to 2 tablespoons whipping cream

Directions
*Note - I doubled this recipe which made a perfect amount to ice and decorate a medium cake.

In a standing mixer fitted with a whisk, mix together sugar and butter. Mix on low speed until well blended and then increase speed to medium and beat for another 3 minutes.

Add vanilla and cream and continue to beat on medium speed for 1 minute more, adding more cream if needed for spreading consistency.

Friday, February 11, 2011

Peanut Butter Swirl Brownies


I've had these brownies bookmarked for ages now, but have not made them because my husband doesn't like peanut butter and chocolate together (freak!). So since he was on a diet and I was craving a sweet, I pulled the recipe from the archives and I'm very glad I did! These were fantastic, I loved the peanut butter filling especially. The brownie was good, but was a bit cake like for me personally. Next time I'd omit an egg to make them a bit fudgier. But all in all, these were delicious and absolutely hit the spot!

Ingredients
Source: Martha Stewart

FOR THE BATTER

8 tablespoons (1 stick) unsalted butter, cut into small pieces, plus more for pan
2 ounces good-quality unsweetened chocolate, coarsely chopped
4 ounces good-quality semisweet chocolate, coarsely chopped
2/3 cup all-purpose flour
1/2 teaspoon baking powder
1/4 teaspoon salt
3/4 cup granulated sugar
3 large eggs
2 teaspoons pure vanilla extract

FOR THE FILLING

4 tablespoons unsalted butter, melted
1/2 cup confectioners' sugar
3/4 cup smooth peanut butter
1/4 teaspoon salt
1/2 teaspoon pure vanilla extract

Directions
  1. Preheat oven to 325 degrees. Butter an 8-inch square baking pan and line with parchment, allowing a 2-inch overhang. Butter lining (not overhang).
  2. Make batter: Put butter and chocolates in a heatproof medium bowl set over a pan of simmering water; stir until melted. Let cool slightly. Whisk together flour, baking powder, and salt in a bowl.
  3. Whisk granulated sugar into chocolate mixture. Add eggs, and whisk until mixture is smooth. Stir in vanilla. Add flour mixture; stir until well incorporated.
  4. Make filling: Stir together butter, confectioners' sugar, peanut butter, salt, and vanilla in a bowl until smooth.
  5. Pour one-third of batter into prepared pan; spread evenly with a rubber spatula. Drop dollops of peanut butter filling (about 1 tablespoon each) on top of batter, spacing about 1 inch apart. Drizzle remaining batter on top, and gently spread to fill pan. Drop dollops of remaining filling on top. Gently swirl peanut butter filling into batter with a butter knife, running the knife lengthwise and crosswise through layers.
  6. Bake until a cake tester inserted into brownies (avoid center and edges) comes out with a few crumbs but is not wet, about 45 minutes. Let cool slightly in pan, about 15 minutes. Lift out; let cool completely on a wire rack before cutting into squares. Brownies can be stored in an airtight container at room temperature up to 3 days.


Wednesday, February 9, 2011

Chocolate Cupcakes with Rapsberry Buttercream

One of my first pregnancy cravings was chocolate cake. Since I didn't have it in me to make an entire cake, I thought I'd do cupcakes and boy did they hit the spot! I used my favorite chocolate cake recipe and made a very simple buttercream to top them. I'd like to say I shared these, but I totally didn't. :)

Ingredients

Source for Cake- Hershey's
Source for Buttercream - Apple A Day

1 recipe chocolate cake, I used this one

20 TBSP (2 ½ sticks) unsalted butter, softened
2 ½ c. confectioners’ sugar, sifted
1/8 tsp. salt
1 TBSP raspbery liquer of 1 1/2 tsp. raspberry extract (I used the extract...obviously)
2 TBSP water, if necessary
gel food coloring, if desired


Directions

Make cupcakes as per recipe directions. Allow to cool completely before frosting.

For the Buttercream

1. In a stand mixer fitted with the whisk attachment, beat the butter at medium-high speed until smooth, about 20 seconds.

2. Add confectioners' sugar and salt. Beat at medium-low speed until most of the sugar is moistened, about 45 seconds. Scrape down the bowl and beat at medium speed until the mixture is fully combined, about 15 seconds.

3. Scrape bowl, add liquer or extract, and beat at medium speed until incorporated, about ten seconds. If using gel food color (I used a few drops of liquid food coloring) add at this time.

4. Increase the speed to medium-high and beat until light and fluffy, about four minutes, scraping down bowl once or twice. Add water to achieve desired consistency, if needed. Ice cupcakes as desired.

Monday, February 7, 2011

Ganache Filled Cookies

These cookies are a wonderful twist on a classic chocolate chip cookie. They take a bit longer to make than a normal chocolate chip cookie, but overall they are straightforward, easy to make and wonderfully delicious. A great concept and wonderful cookie, these are certainly a fun way to reinvent a classic.

Ingredients
Source: Sing for your Supper

1 batch chocolate chip cookie dough, without the chocolate chips (any recipe you want)
1/2 cup heavy cream
1 cup (approx. 6 oz.) chocolate chips
pinch of sugar
salt for sprinkling (I omitted)

Directions

Preheat oven to 350 degrees. Heat heavy cream and sugar in a small pan over medium heat until boiling; pour over the chocolate chips. Let sit for a few seconds then stir to combine. Chill for at least one hour.

Make the cookie dough according to desired recipe. Chill.

To assemble: using a small cookie scoop or a spoon, scoop out some dough (a small amount. My first batch I made the size of a normal cookie but after I baked it it got HUGE. So definitely make the pieces of dough on the small size) and liberally sprinkle your palm with flour- flatten the dough on the palm of your hand and place a small spoonful of ganache in the center. Cover with another piece of flattened dough and seal the edges (you’ll have a small disk), then gently roll into a ball. Place on a baking sheet lined with parchment paper. Sprinkle with sea salt. Place each cookie at least 2 inches apart on cookie sheet.
Bake for 12-15 minutes, or until cookies are golden brown. Makes aprox. 30 cookies.

Sunday, February 6, 2011

It's been 3 months...

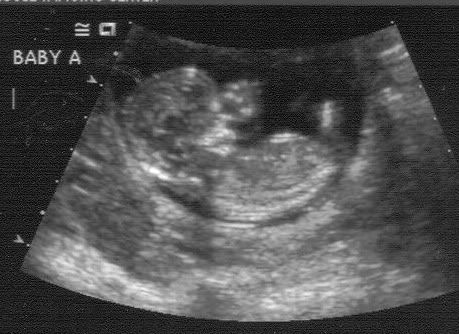
It's been just about 3 months since I've posted anything. Huh. I wonder what could have prevented me from cooking/blogging for 3 months....

I'll give you a hint.

And no, those are not two pictures of the same baby.

I'm pregnant with twins!!!! A little over 17 weeks to be exact, and the babies are doing great!

First trimester morning sickness was a nightmare. Not to be too graphic, but I was throwing up everything I put down and lost around 10 lbs. I tried to continue to blog but it was too hard. I didn't even start cooking again until just recently.

And while morning "nausea" is still lingering, I'm feeling better by the day and am getting back in the kitchen! I certainly can't promise that I'll be posting with any sort of frequency, but I'm doing my best and definitely want to continue with my blog.

Thanks for hanging in there with me, and again my apologies for my prolonged absence!

Monday, November 1, 2010

Butternut Squash Pierogi


I had the idea to make butternut squash pierogi while driving to work. It's funny, that's where a lot of my ideas come from. I just hadn't made pierogi in a while and wanted to do something different. Then I remembered I had 15 butternut squash in my garage that were freshly picked from the garden, so I figured butternut squash pierogi would work out pretty well!

I have to say, I absolutely loved these. They are full of fresh, autumnal flavors. The sage comes through delightfully, but the delicate butternut squash is the star. Sauté these in some butter and onions, and the outside of the pierogi becomes perfectly crisp which lends itself to the tender center perfectly.
For the Pierogi Dough

Ingredients
Source: Martha Stewart

1 large egg
2 tablespoons sour cream
1 cup milk
1 cup water
4 1/2 to 5 cups all-purpose flour, plus more for dusting

Directions

Make the dough: In a medium bowl, whisk egg. Add sour cream, and whisk until smooth. Add milk and 1 cup water, and whisk until combined. Slowly add about 3 cups flour, and stir with a wooden spoon to combine.


Turn dough out onto a well-floured surface and work in about 1 cup flour as you knead. Use a plastic scraper to lift dough as it will stick to the counter before flour is worked in. Continue kneading for 8 to 10 minutes, working in another 1/2 cup flour. The dough should be elastic in texture and no longer sticky. Be careful not to add too much flour, as this will toughen dough. Place dough in a lightly floured bowl and cover with plastic wrap and let rest while you prepare filling.

Butternut Squash Filling
(Note - this will make about 30 or so pierogi, which is about half of the pierogi from the recipe above. I made 1/2 butternut squash and 1/2 potato, but if you want to make all butternut squash, I'd recommend doubling this recipe)

Ingredients
1 medium to large Butternut squash
4-6 large, fresh sage leaves
1/2 - 1 tsp cinnamon
pinch of ground ginger
1/8 - 1/4 tsp freshly grated nutmeg
salt and freshly ground black pepper to taste

Directions

Preheat oven to 400 degrees and line a baking sheet with parchment paper. Cut the butternut squash in half lengthwise and scoop out the seeds and discard. Place on the prepared baking sheet, cut side down, and bake until very soft with pierced with he top of a knife, about 35-45 minutes. Let cool to the touch. Peel the squash and place the flesh into a medium bowl. Add remaining ingredients to the bowl, and stir well until very smooth.

To assemble pierogi:
On a floured surface, roll out dough to about 1/8 inch thick. Using a glass or cookie cutter measuring 2 1/2 inches in diameter, cut out as many circles as possible. Gather dough scraps together, rolling them out again, and continue cutting.

Scoop a teaspoon of filling and place a ball in the center of each dough circle.
Moisten the edges with water, fold over, and press together with a fork to seal. Repeat procedure with the remaining dough.

You can now freeze your Pierogi if you choose to do so. I put them on wax paper on a baking sheet and freeze for about 20 minutes or so. Then I put them in a larger air-tight container and layer them between wax paper. They freeze very well.

To cook pierogi (frozen or not) Bring a large pot of lightly salted water to a boil. Add perogies and cook for 3 to 5 minutes or until pierogi float to the top. Remove with a slotted spoon. In a separate pan, melt about 1/2 stick of butter. Add about 1/2-1 cup of chopped onions and cook until translucent. Add boiled pierogi to pan and fry until golden brown on each side.

Friday, October 29, 2010

Candy "Eyeballs"


It's been far too long since I made peanut butter balls (I think the last time I made them was Christmas! The very idea sends shivers down my spine!) So when I saw the idea for peanut butter eyeballs on Allrecipes.com I was so excited to break out the jar of peanut butter and make little eyeballs for work. I'm actually not very "into" Halloween to be honest. The only thing that appeals to me are the cute treats that I get to make. But besides that, my husband and I really don't do anything to celebrate. Not to mention we live in a very rural area and haven't gotten a trick or treater, well, ever.

But everyone at work certainly appreciates my treats so I knew they'd get a kick out of these little eye balls. And not only did I make Peanut butter eyeballs, but cake eyeballs as well! These went over so well. Not only did they taste great, everyone thought they were hysterical! These would be so great for a kid OR Adult Halloween party!

Happy Halloween!

Oh yeah - and since I probably won't be posting on Sunday, happy 2 year bloggiversary to Le Petit Pierogi! Thanks to everyone who still reads, despite the fact that I don't get to post as often as I'd like to anymore!!!


Peanut Butter Eyeballs

Ingredients
Adapted from Allrecipes.com

1 cup creamy peanut butter
1 stick unsalted butter
1/2 tsp vanilla extract
1/2 - 1 lb confectioners sugar
White candy melts
Aprox 1 tbsp. shortening

Directions
Melt butter in a medium saucepan over medium heat. Add peanut butter and stir until mixture is very smooth. Add vanilla. Slowly stir in confectioners sugar until desired consistancy is reached. When mixture is cooled, form into balls on a parchment lined cookie sheet and place in refrigerator at least 30 minutes. Meanwhile over a double boiler, melt white chocolate candy melts with a small dollop of shortening and stir until white chocolate is melted. Dip peanut butter balls in chocolate and place back on cookie sheet. To make the "iris" and "pupil," add some white chocolate into small, separate bowls. Add a bit of gel food coloring (in desired color) to the white chocolate and stir to combine. With a small paintbrush, glob on colored white chocolate to complete the "eye!"
Cake Eyeballs

Ingredients
Cakeball Recipe from Bakerella

1 box cake mix
1 can frosting
white chocolate candy melts
1 tbsp shortening

Directions
Cook cake according to package directions in a 13 x 9 pan. After the cake is done baking, allow it to cool completely. Then crumble it into a large bowl (I use my kitchen aid stand mixer - it makes combining the cake and frosting SO much easier). Add the entire can of frosting and stir by hand, or using the paddle attachment of you mixer. Form into balls on a parchment lined baking sheet and cool in the refrigerator. Meanwhile over a double boiler, melt white chocolate candy melts with a small dollop of shortening and stir until white chocolate is melted. Dip peanut butter balls in chocolate and place back on cookie sheet. To make the "iris" and "pupil," add some white chocolate into small, separate bowls. Add a bit of gel food coloring (in desired color) to the white chocolate and stir to combine. With a small paintbrush, glob on colored white chocolate to complete the "eye!"
 

blogger templates | Make Money Online