Showing posts with label Chocolate. Show all posts

Sunday, February 13, 2011

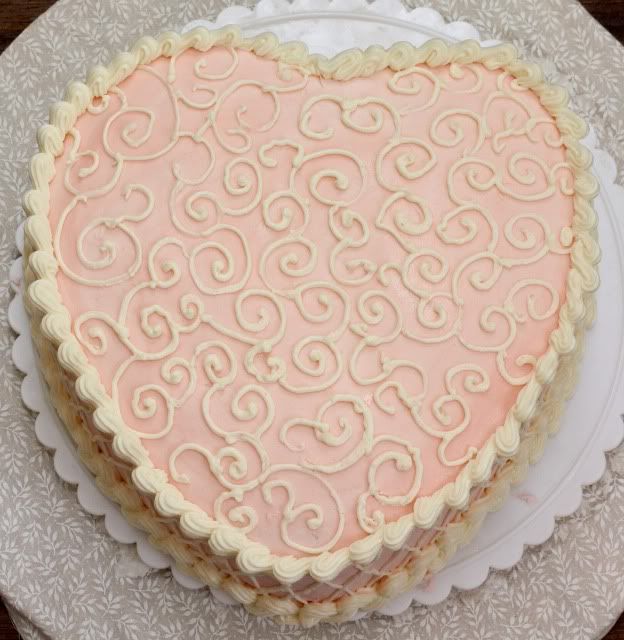
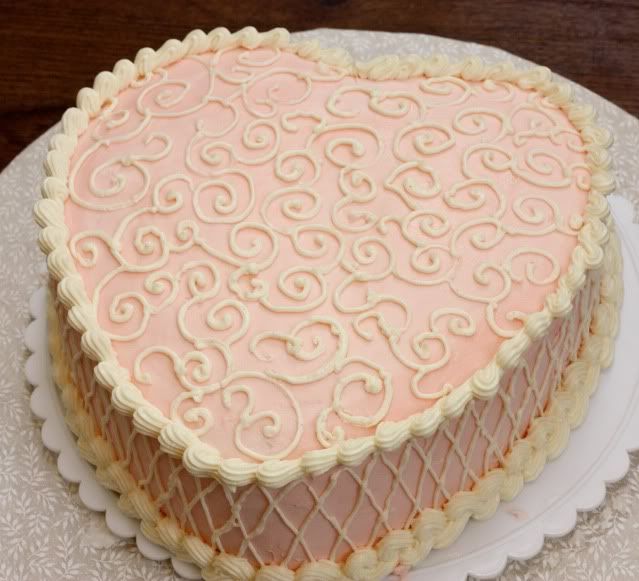
Valentine's Day Cake


It's been months since I've made a cake, so I decided to make one for Valentine's Day. I made a simple chocolate cake and filled it with whipped ganache and iced it in traditional vanilla butttercream. Can we say decadence?!

For the cake I used my favorite Hershey's Perfectly Chocolate Cake.

Whipped Ganache Cake Filling
Source: Martha Stewart

Ingredients
16 oz. semi sweet chocolate, chopped
2 1/2 cups heavy cream

Directions
*Note - I halved this recipe to fill one medium sized cake. It worked perfectly and was just enough to fill the cake with.

Place the semisweet chocolate in a large heat-proof bowl. Bring cream to a boil in heavy-bottom pan over medium-high heat; pour over the chocolate. Let sit for 10 minutes; use rubber spatula to stir until smooth.


Let chocolate mixture cool to room temperature, stirring occasionally. Place mixture in the bowl of an electric mixer fitted with a whisk attachment. Whip on medium speed until ganache holds its shape and is slightly lightened in color.


Easy Vanilla Buttercream
Source: Food Network

Ingredients

3 cups confectioners' sugar
1 cup butter
1 teaspoon vanilla extract
1 to 2 tablespoons whipping cream

Directions
*Note - I doubled this recipe which made a perfect amount to ice and decorate a medium cake.

In a standing mixer fitted with a whisk, mix together sugar and butter. Mix on low speed until well blended and then increase speed to medium and beat for another 3 minutes.

Add vanilla and cream and continue to beat on medium speed for 1 minute more, adding more cream if needed for spreading consistency.

Friday, February 11, 2011

Peanut Butter Swirl Brownies


I've had these brownies bookmarked for ages now, but have not made them because my husband doesn't like peanut butter and chocolate together (freak!). So since he was on a diet and I was craving a sweet, I pulled the recipe from the archives and I'm very glad I did! These were fantastic, I loved the peanut butter filling especially. The brownie was good, but was a bit cake like for me personally. Next time I'd omit an egg to make them a bit fudgier. But all in all, these were delicious and absolutely hit the spot!

Ingredients
Source: Martha Stewart

FOR THE BATTER

8 tablespoons (1 stick) unsalted butter, cut into small pieces, plus more for pan
2 ounces good-quality unsweetened chocolate, coarsely chopped
4 ounces good-quality semisweet chocolate, coarsely chopped
2/3 cup all-purpose flour
1/2 teaspoon baking powder
1/4 teaspoon salt
3/4 cup granulated sugar
3 large eggs
2 teaspoons pure vanilla extract

FOR THE FILLING

4 tablespoons unsalted butter, melted
1/2 cup confectioners' sugar
3/4 cup smooth peanut butter
1/4 teaspoon salt
1/2 teaspoon pure vanilla extract

Directions
  1. Preheat oven to 325 degrees. Butter an 8-inch square baking pan and line with parchment, allowing a 2-inch overhang. Butter lining (not overhang).
  2. Make batter: Put butter and chocolates in a heatproof medium bowl set over a pan of simmering water; stir until melted. Let cool slightly. Whisk together flour, baking powder, and salt in a bowl.
  3. Whisk granulated sugar into chocolate mixture. Add eggs, and whisk until mixture is smooth. Stir in vanilla. Add flour mixture; stir until well incorporated.
  4. Make filling: Stir together butter, confectioners' sugar, peanut butter, salt, and vanilla in a bowl until smooth.
  5. Pour one-third of batter into prepared pan; spread evenly with a rubber spatula. Drop dollops of peanut butter filling (about 1 tablespoon each) on top of batter, spacing about 1 inch apart. Drizzle remaining batter on top, and gently spread to fill pan. Drop dollops of remaining filling on top. Gently swirl peanut butter filling into batter with a butter knife, running the knife lengthwise and crosswise through layers.
  6. Bake until a cake tester inserted into brownies (avoid center and edges) comes out with a few crumbs but is not wet, about 45 minutes. Let cool slightly in pan, about 15 minutes. Lift out; let cool completely on a wire rack before cutting into squares. Brownies can be stored in an airtight container at room temperature up to 3 days.


Wednesday, February 9, 2011

Chocolate Cupcakes with Rapsberry Buttercream

One of my first pregnancy cravings was chocolate cake. Since I didn't have it in me to make an entire cake, I thought I'd do cupcakes and boy did they hit the spot! I used my favorite chocolate cake recipe and made a very simple buttercream to top them. I'd like to say I shared these, but I totally didn't. :)

Ingredients

Source for Cake- Hershey's
Source for Buttercream - Apple A Day

1 recipe chocolate cake, I used this one

20 TBSP (2 ½ sticks) unsalted butter, softened
2 ½ c. confectioners’ sugar, sifted
1/8 tsp. salt
1 TBSP raspbery liquer of 1 1/2 tsp. raspberry extract (I used the extract...obviously)
2 TBSP water, if necessary
gel food coloring, if desired


Directions

Make cupcakes as per recipe directions. Allow to cool completely before frosting.

For the Buttercream

1. In a stand mixer fitted with the whisk attachment, beat the butter at medium-high speed until smooth, about 20 seconds.

2. Add confectioners' sugar and salt. Beat at medium-low speed until most of the sugar is moistened, about 45 seconds. Scrape down the bowl and beat at medium speed until the mixture is fully combined, about 15 seconds.

3. Scrape bowl, add liquer or extract, and beat at medium speed until incorporated, about ten seconds. If using gel food color (I used a few drops of liquid food coloring) add at this time.

4. Increase the speed to medium-high and beat until light and fluffy, about four minutes, scraping down bowl once or twice. Add water to achieve desired consistency, if needed. Ice cupcakes as desired.

Monday, February 7, 2011

Ganache Filled Cookies

These cookies are a wonderful twist on a classic chocolate chip cookie. They take a bit longer to make than a normal chocolate chip cookie, but overall they are straightforward, easy to make and wonderfully delicious. A great concept and wonderful cookie, these are certainly a fun way to reinvent a classic.

Ingredients
Source: Sing for your Supper

1 batch chocolate chip cookie dough, without the chocolate chips (any recipe you want)
1/2 cup heavy cream
1 cup (approx. 6 oz.) chocolate chips
pinch of sugar
salt for sprinkling (I omitted)

Directions

Preheat oven to 350 degrees. Heat heavy cream and sugar in a small pan over medium heat until boiling; pour over the chocolate chips. Let sit for a few seconds then stir to combine. Chill for at least one hour.

Make the cookie dough according to desired recipe. Chill.

To assemble: using a small cookie scoop or a spoon, scoop out some dough (a small amount. My first batch I made the size of a normal cookie but after I baked it it got HUGE. So definitely make the pieces of dough on the small size) and liberally sprinkle your palm with flour- flatten the dough on the palm of your hand and place a small spoonful of ganache in the center. Cover with another piece of flattened dough and seal the edges (you’ll have a small disk), then gently roll into a ball. Place on a baking sheet lined with parchment paper. Sprinkle with sea salt. Place each cookie at least 2 inches apart on cookie sheet.
Bake for 12-15 minutes, or until cookies are golden brown. Makes aprox. 30 cookies.

Friday, October 29, 2010

Candy "Eyeballs"


It's been far too long since I made peanut butter balls (I think the last time I made them was Christmas! The very idea sends shivers down my spine!) So when I saw the idea for peanut butter eyeballs on Allrecipes.com I was so excited to break out the jar of peanut butter and make little eyeballs for work. I'm actually not very "into" Halloween to be honest. The only thing that appeals to me are the cute treats that I get to make. But besides that, my husband and I really don't do anything to celebrate. Not to mention we live in a very rural area and haven't gotten a trick or treater, well, ever.

But everyone at work certainly appreciates my treats so I knew they'd get a kick out of these little eye balls. And not only did I make Peanut butter eyeballs, but cake eyeballs as well! These went over so well. Not only did they taste great, everyone thought they were hysterical! These would be so great for a kid OR Adult Halloween party!

Happy Halloween!

Oh yeah - and since I probably won't be posting on Sunday, happy 2 year bloggiversary to Le Petit Pierogi! Thanks to everyone who still reads, despite the fact that I don't get to post as often as I'd like to anymore!!!


Peanut Butter Eyeballs

Ingredients
Adapted from Allrecipes.com

1 cup creamy peanut butter
1 stick unsalted butter
1/2 tsp vanilla extract
1/2 - 1 lb confectioners sugar
White candy melts
Aprox 1 tbsp. shortening

Directions
Melt butter in a medium saucepan over medium heat. Add peanut butter and stir until mixture is very smooth. Add vanilla. Slowly stir in confectioners sugar until desired consistancy is reached. When mixture is cooled, form into balls on a parchment lined cookie sheet and place in refrigerator at least 30 minutes. Meanwhile over a double boiler, melt white chocolate candy melts with a small dollop of shortening and stir until white chocolate is melted. Dip peanut butter balls in chocolate and place back on cookie sheet. To make the "iris" and "pupil," add some white chocolate into small, separate bowls. Add a bit of gel food coloring (in desired color) to the white chocolate and stir to combine. With a small paintbrush, glob on colored white chocolate to complete the "eye!"

Cake Eyeballs

Ingredients
Cakeball Recipe from Bakerella

1 box cake mix
1 can frosting
white chocolate candy melts
1 tbsp shortening

Directions
Cook cake according to package directions in a 13 x 9 pan. After the cake is done baking, allow it to cool completely. Then crumble it into a large bowl (I use my kitchen aid stand mixer - it makes combining the cake and frosting SO much easier). Add the entire can of frosting and stir by hand, or using the paddle attachment of you mixer. Form into balls on a parchment lined baking sheet and cool in the refrigerator. Meanwhile over a double boiler, melt white chocolate candy melts with a small dollop of shortening and stir until white chocolate is melted. Dip peanut butter balls in chocolate and place back on cookie sheet. To make the "iris" and "pupil," add some white chocolate into small, separate bowls. Add a bit of gel food coloring (in desired color) to the white chocolate and stir to combine. With a small paintbrush, glob on colored white chocolate to complete the "eye!"

Wednesday, October 6, 2010

Caramel Apples


Back in high school my two worst subjects were math and science. But today we're going to talk about science. Not like I hated it (math was far worse), but all those symbols and equations and yeah....it was just too complicated for me.

But as I age, I'm finding that I love making things that are, well, science-ey (Don't worry, I was an English major in college so I'm allowed to make up words). I love when one thing transforms into another, I LOVE my candy thermometer, and I love making big sticky messes. And since I have an influx of apples from the orchard, I decided to make caramel apples for my coworkers (and myself. And my husband.)

These came out SO cute! I loved making the caramel and decorating the sweet little apples. Some toppings I did were: Chocolate, Chocolate with Peanuts, Toffee bits, Halloween Sprinkles, and pecans (my personal favorite is the chocolate with peanuts)! These are impressive, adorable and a huge hit with kids and adults alike!!!

Ingredients
Source: Martha Stewart

1 cup granulated sugar
1 1/4 cups heavy cream
1/2 cup light corn syrup
2 tablespoons unsalted butter
1 teaspoon vanilla extract
10 to 12 small apples, stems removed (I only got 9-10 out of the recipe)
Vegetable-oil cooking spray
Round wooden skewers

Directions


Heat sugar, cream, corn syrup, and butter in a saucepan over medium-high heat, stirring until butter has melted. Clip a candy thermometer to side of pan, and continue to cook until mixture reaches 240 degrees. Remove from heat, and stir in vanilla. Let cool for 5 minutes.

Line a baking sheet with parchment paper, and coat with cooking spray. Insert a skewer into stem end of each apple. Dip apples in caramel, and place on sheet. Let stand until set, at least 1 hour. Apples can be stored airtight for up to 1 day.


Friday, October 1, 2010

Caramel Corn


When I first told my husband I was making this he gave me a weird look. I asked him if he liked caramel corn and he replied "not really." I gave him a surprised look and asked why, if he like caramel, and popcorn, he didn't like caramel corn? And he just shrugged.

Well, never mind him, I thought it would be fun to make.

After it was finished, I made him try a piece. Then he asked if he could have another. Then he asked if he could have a bowl. Success! My husband is now a caramel corn convert.

I do have to warn you though - this stuff is SERIOUSLY addicting. You simply cannot have just one piece. I daresay it's worse than potato chips. Something about the sweet salty crunch just makes you want to have it more and more (and more). Enjoy!

Ingredients

Source: Christie's Corner

1 cup popcorn unpopped (makes enough to fill a Dutch over or about 6 quarts)
1 cup butter
1/2 cup light corn syrup
2 cups brown sugar (packed)
1 tsp kosher salt
1/2 tsp baking soda
1 tsp vanilla

Directions

Preheat oven to 250F.

Pop popcorn using your preferred method (I just popped it with a little oil in my dutch oven over medium heat). Place popped corn in a very large bowl. If you don’t have a big enough bowl, use two bowls. You will need lots of room to toss the corn when coating it.

In a saucepan over medium heat, melt the butter. Stir in the corn syrup, brown sugar and salt. Increase the heat to medium-high and bring the sugar mixture to a boil, stirring constantly. Boil for 5 minutes without stirring.

Remove from the heat and stir in the baking soda and vanilla. The mixture will foam and become frothy.

Pour the caramel sauce over the popped corn and toss to coat thoroughly. Don’t worry about clumps as the caramel will turn much more spreadable while cooking and the coating can be evened out.

Spread the popcorn evenly onto 2 large cookie or baking sheets lined with foil and sprayed with non stick spray. Bake for 40 to 50 minutes, tossing every 10-20 minutes or so.

This makes for a lovely gift bag for Halloween parties, Office parties, or even for your trick - or - treaters. Simply put in a cellophane bags and add a bit of candy corn and some M & M's. Everyone will love this sweet little treat!


Friday, February 12, 2010

Chocolate Chambord Truffle Brownies


When I saw this recipe, I knew it would be perfect for Valentine's Day. Chocolate, truffles, brownies...three of my favorite things. And of course I had to add some chambord because chambord and chocolate were just made for each other.

I normally don't like "frosting" on brownies, but this ganache is just a heavenly addition. The density of the brownie and the creaminess of the ganache is a wonderful combination that just exudes decadence.

I cut these brownies out into heart shapes for Valentine's Day, but you can also just cut them into squares or make them in a spring form pan and cut them in wedges. But no matter how you serve these, they will be a delicious treat for any occasion.

Ingredients
Adapted from Martha Stewart

4 tablespoons unsalted butter, plus more for pan
3 ounces good-quality unsweetened chocolate, coarsely chopped
1/2 cup all-purpose flour
1/4 teaspoon baking powder
1/2 teaspoon salt
1 cup sugar
2 large eggs
1/4 cup milk
1 teaspoon pure vanilla extract
4 ounces good-quality semisweet chocolate, coarsely chopped
2/3 cup heavy cream
2 tsp chambord (optional)
Heart-shaped sprinkles, for garnish (optional)


Directions

Preheat oven to 325 degrees. Spread shortening into an 11-7 inch pan, line with parchment paper, then spread shortening on the parchment paper. Set aside.


Make batter: Put butter and chocolate in a heatproof medium bowl set over a pan of simmering water; stir until melted. Let cool slightly.


Whisk together flour, baking powder, and salt in a separate bowl; set aside.


Put sugar and eggs in the bowl of an electric mixer fitted with the whisk attachment, and beat on medium speed until pale and fluffy, about 4 minutes. Add chocolate mixture, milk, and vanilla, and beat until combined. Add flour mixture; beat, scraping down sides of bowl, until well incorporated.


Pour batter into prepared pan. Bake until a cake tester inserted into brownies (avoid center and edges) comes out with a few crumbs but is not wet, 27 to 30 minutes. Let cool completely in pan.


Make topping when brownies are cool: Put chocolate in a medium bowl. Heat cream in a small saucepan over medium-high heat until just simmering. Pour over chocolate and gently whisk until smooth. Add chambord if using and whisk to combine thoroughly. Keep in mind that you can use more chambord for a stronger raspberry flavor, but the more alcohol you use the less the ganache will set up. I found 2 tsp worked well. Allow ganache to cool, stirring every 10 minutes, until slightly thickened, 25 to 30 minutes.


Pour ganache over cooled brownies in pan; let set, about 20 minutes. Refrigerate until cold, 30 minutes to 1 hour. Let brownies stand at room temperature at least 15 minutes before serving. Lift out brownies; cut into wedges, wiping knife with a hot, damp cloth between each cut. Scatter sprinkles on top.

Monday, February 8, 2010

Guinness Chocolate Cupcakes with Baileys Irish Buttercream


I can't believe it, but my little baby brother just celebrated his 21st birthday. I guess he's not so little anymore. To celebrate this milestone birthday, I had to bake him some cupcakes. But not just any cupcakes...spiked cupcakes of course. I mean, what's a big sister for?!

I brought these to work in celebration of Kevin's birthday (we both work at the same place) and he and our coworkers just loved them. Last count...Kevin ate 4 with Jimmy coming in at 3. These were gone in a flash and everyone raved.

The Guinness pretty much bakes out of the cupcake itself, but leaves you with a super-moist, perfectly flavored chocolate cake. The buttercream is delicious...Great consistency and flavor with the Bailey's definitely at the forefront. I skipped the ganache portion of this cupcake, simply from lack of time and from the fact that I didn't want these to be TOO boozy since I was bringing them to work! (If you want the recipe with the ganache, head over to Smitten Kitchen) But even without the ganache, these were delicious. I already have requests to make them again!

Ingredients
Adapted from Smitten Kitchen

For the Guinness Chocolate Cupcakes

1 cup Guinness
1 cup (2 sticks) unsalted butter
3/4 cup unsweetened cocoa powder (preferably Dutch-process)
2 cups all purpose flour
2 cups sugar
1 1/2 teaspoons baking soda
3/4 teaspoon salt
2 large eggs
2/3 cup sour cream (I used light)

Baileys Irish Buttercream
3 to 4 cups confections sugar (I used about 3.5 cups)
1 stick (1/2 cup or 4 ounces) unsalted butter, at room temperature
3 to 4 tablespoons Baileys Irish Cream (I used 3 tbsp Bailey's and 1 tbsp milk to get it to the right consistency)

Directions

Preheat oven to 350°F. Line 24 cupcake cups with liners. In a saucepan over medium heat, melt butter and add Guinness. Bring to a simmer. Whisk in cocoa powder until mixture is smooth. Set aside to cool slightly.

In a large bowl stir together flour, sugar, baking soda, and 3/4 teaspoon salt. In the bowl of a stand mixer fitted with the paddle attachment, beat eggs and sour cream until thoroughly combined. On low speed, drizzle in Guinness-chocolate mixture and beat just to combine. Add flour mixture, a little at a time, and mix briefly on slow speed just until the mixture comes together. Using rubber spatula, fold batter until completely combined. Divide batter among cupcake liners, filling them 2/3 to 3/4 of the way. Bake cake until toothpick inserted into center comes out clean, rotating them once front to back if your oven bakes unevenly, about 17 minutes. Cool cupcakes on a rack completely. (I always bake my cupcakes and cakes the day before I frost them which always works out well for me).

To make the buttercream, whip the butter in the bowl of a stand mixer fitted with the paddle attachment (I use this. I don't know if I've ever mentioned this before, but this product is amazing and SO WORTH IT. If you're debating on buying it or not, I HIGHLY suggest you do. I honestly can't remember the last time I used my "actual" paddle attachment since I bought this) for several minutes until the butter is very light and fluffy. Slowly add the powdered sugar, a few tablespoons at a time.

When the frosting looks thick enough to spread, drizzle in the Baileys (or milk) and whip it until combined. If this has made the frosting too thin (it shouldn’t, but just in case) beat in another spoonful or two of powdered sugar.

Ice and decorate the cupcakes.

Friday, January 29, 2010

Chewy Chocolate Cookies


This is my wonderful mother in law's recipe. My mother in law is an awesome lady...kind, loving and she can bake a darn good cookie. This recipe is simply wonderful and I was so excited to recieve the recipe as part of my Christmas gift this year! My husband and I just go crazy over these cookies...they are soft, chewy and have the perfect amount of chocolatey sweetness. They are by far our favorite cookie.

This is certainly a recipe I'll cherish forever, and I hope you will love it as much as our family does!

Ingredients
Source: My mother in law

1 1/4 cup unsalted butter, softened
2 cups granulated sugar
2 eggs
2 tsp vanilla
2 cups unsifted all purpose flour
3/4 cups cocoa powder
1 tsp baking soda
1 cup chocolate chips or chunks
1/2 tsp salt
1 cup finely chopped nuts (optional...I don't use them because my husband doesn't like nuts)

Directions
Preheat oven to 350 degrees and line baking sheets with parchment paper.

Cream butter until light and pale in the bowl of a stand mixer fitted with the paddle attachment. Add sugar and continue to mix well. Add eggs and vanilla and mix well. Combine flour, cocoa, baking soda and salt in a medium bowl. Mix toghether with a spoon. On low speed, add flour mixture into the creamed egg mixture just until it comes together. Stir in chocolate chunks and nuts (if you are using them). Drop by teaspoon onto the lined baking sheet. Bake for 8-9 minutes, or until soft and puffed up. Cool on cookie sheet until set up, about a minute or two. Then transfer to a wire rack to cool completely.

Tuesday, January 12, 2010

Bête noire


For as long as I can remember, this has been my absolute favorite dessert. Since my mom and dad brought me to a wonderful local French restaurant when I was just a girl, I just couldn't get enough bête noire. It's rich, dense and oh so chocolatey. Never did I think it was something I could make at home.

But I attempted it for a recent dinner party I hosted and I am SO glad I did!!! This amazing flourless chocolate cake was just perfect and just like I remember. You can also make this dessert up to two days ahead which is great for when you are entertaining. It it just so indulgent, and certainly a dessert to impress.

Ingredients
Source: Epicurious, Originally from Bon Appétit, September 2006

Cake
1 cup water
3/4 cup sugar

9 tablespoons (1 stick plus 1 tablespoon) unsalted butter, diced
18 ounces bittersweet (not unsweetened) or semisweet chocolate, chopped (I used semisweet)
6 large eggs

Ganache
1 cup heavy whipping cream
8 ounces bittersweet (not unsweetened) or semisweet chocolate, chopped (I used semisweet)

Directions

For cake:
Preheat oven to 350°F. Butter 10-inch-diameter springform pan. Line bottom of pan with parchment round; butter parchment. Wrap 3 layers of heavy-duty foil around outside of pan, bringing foil to top of rim. Combine 1 cup water and sugar in small saucepan. Bring to boil over medium heat, stirring until sugar dissolves. Simmer 5 minutes. Remove from heat.

Melt butter in large saucepan over low heat. Add chocolate and whisk until smooth. Whisk sugar syrup into chocolate; cool slightly. Add eggs to chocolate mixture and whisk until well blended. Pour batter into prepared pan. Place cake pan in large roasting pan. Add enough hot water to roasting pan to come halfway up sides of cake pan.

Bake cake until center no longer moves when pan is gently shaken, about 50 minutes. Remove from water bath; transfer to rack. Cool completely in pan.

For ganache:
Bring whipping cream to simmer in small saucepan over medium heat. Remove from heat. Add chocolate and whisk until smooth. Pour over top of cake still in pan. Gently shake pan to distribute ganache evenly over top of cake. Refrigerate cake in pan until ganache is set, about 2 hours. DO AHEAD: Can be made 2 days ahead. Cover and keep refrigerated.

Run knife around pan sides to loosen cake; release sides. Cut cake into wedges and serve with whipped cream.

Wednesday, December 23, 2009

Chocolate Covered Snow Peaks


When my friend Julie sent me this recipe I was really excited! I love working with meringue...I think it's so fun. These were a great addition to my cookie tray. They were light and airy in contrast to most of the other decadent treats I've made this year. They pair perfectly with a hot cup of tea and are just a great little addition to a cookie tray.
Ingredients
Source: Tyler Florence

4 large egg whites at room temperature
1 teaspoon cream of tartar
1 cup plus 2 tablespoons superfine granulated sugar (I used regular granulated...not superfine. This worked fine)
1 teaspoon pure vanilla extract (I used clear)
1 1/2 cups dark chocolate chips
Directions

Preheat oven to 225 degrees F and line 2 baking sheets with parchment paper.

In the bowl of an electric mixer, beat egg whites on low-medium speed with the whisk attachment until the whites become foamy. Add the cream of tartar and turn speed up to medium, beating until just fluffy. Add the sugar gradually, so it incorporates into the whites slowly without collapsing them. Once all the sugar has been added, add the vanilla and increase the speed to high, whisking until the meringue is firm and glossy, about 5 to 7 minutes.

Place meringue mixture into a piping bag with a medium-sized nozzle attached (I used a large star tip...I'm quite sure it was #32) Pipe 24 bite-sized "kiss"-shaped meringues onto the trays and place in the oven. Bake for 1 hour undisturbed then turn off heat and leave in the oven overnight to really dry out.

Melt chocolate over a double-boiler or in the microwave on medium power for 30 seconds. Holding each meringue by the peak dip the bases in chocolate so the bottom half of the meringue is coated. Let any excess chocolate drop off before placing on a cookie sheet lined with wax paper. Allow to set at room temperature - do not put in the fridge. Once set, store in an airtight container.

Monday, December 21, 2009

Eggnog Truffles


Last year I saw this recipe on Good Things Catered and wanted to try it as soon as it was posted. But I had already made my cookie trays and decided to put it on hold until next year. Well next year is here and I was so excited to try these. I absolutely love eggnog and truffles so how could I pass these up?

These are absolutely fabulous truffles. I was worried that the eggnog flavor wouldn't be strong enough but it totally was. It's the first flavor you taste when biting into it. And trust me, I know. I've bitten into (more than) a few of these since I made them!

These are the perfect truffles for your Holiday cookie tray as they bring all the delicious and reminiscent flavors of Christmas into a sweet little candy that no one can resist.

Ingredients
Source: Good Things Catered

14 oz. white candy melts (I used vanilla flavored)
1/3 c. eggnog (must be the full fat kind)
1/8 tsp ground cinnamon
1/8 tsp freshly ground nutmeg
splash good bourbon (I omitted)
6 oz. dark chocolate

Directions
-In large (shallow and wide) bowl over pan of boiling water over medium low heat, combine white chocolate, eggnog, cinnamon and nutmeg.
-Stir until completely melted and smooth.
-Remove from heat, add bourbon, stir well to incorporate and place bowl in the fridge overnight (or until completely firmed, this will depend on temperature of fridge and deepness of bowl you placed mixture in)
-Remove bowl from fridge and roll tsp of truffle filling into balls.
-Place formed balls onto wax paper lined baking sheet and place in freezer.
-Meanwhile, melt dark chocolate, stirring until smooth.
-Remove truffles from freezer, roll to make sure evenness then dip into chocolate and sprinkle with decoration if using.
-Place finished truffle back onto wax paper lined baking tray and repeat with remaining truffles.
-Let stand for 1 hour or until completely dry and serve or package in airtight container for up to a week.

Yields about 50 truffles

Friday, December 18, 2009

Chocolate Covered Cherries


When my friend Julie sent me the link to this recipe...I was admittedly hesitant. I have never liked chocolate covered cherries but then again I've never had a homemade one either. Needless to say, I was intrigued by the recipe and decided to try it because I know many people do like these little treats for the holidays.

I am SO glad I tried it! These are really fantastic. After you let them sit for a week or so the filling gets all mushy and delicious. That combined with the dark chocolate shell just makes for a fabulous little treat.

I actually made this recipe two ways. One with regular maraschino cherries out of the jar, and the other with maraschino cherries that I soaked in a cherry liqueur for the adults. I haven't tried the ones with alcohol yet since they are still soaking, but I know we will just love those too!

Ingredients
Adapted from: AllRecipes

60 maraschino cherries with stems (I used stemless)
3 tablespoons butter, softened
3 tablespoons corn syrup (I used about 4 tbsp...3 wasn't enough for me as the mixture was still very dry)
2 cups sifted confectioners' sugar
1 lb. chocolate confectioners coating (I used dark chocolate candy melts)

Directions

Drain cherries and set on paper towels to dry thoroughly.


In a medium bowl, combine butter and corn syrup until smooth. Stir in confectioners' sugar and knead to form a dough. Chill to stiffen if necessary. Wrap each cherry in about 1 teaspoon of dough. Chill until firm.


Melt confectioners' coating in a heavy saucepan over low heat. Dip each cherry in by its stem, and place on waxed paper lined sheets. Chill until completely set. Store in an airtight container in a cool place. Best after 1 or 2 weeks.

Friday, December 11, 2009

Chocolate Crinkles


These cookies were a delicious addition to my Christmas Cookie tray this year. They have just the right amount of sweetness and a lovely look with the crinkled top. They were also easy to make which is always important to me this time of year when everything is so hectic.

This is a great little cookie that is perfect for the holidays or any time of year

Ingredients
Adapted from Better Homes and Gardens

4 eggs
1-3/4
cups granulated sugar
4
ounces unsweetened chocolate, melted and cooled slightly
1/2
cup cooking oil
2
teaspoons baking powder
2
teaspoons vanilla
2
cups all-purpose flour
2/3
cup demerara sugar or turbinado sugar (I used granulated)

Directions

1. In a large bowl, combine eggs, granulated sugar, melted chocolate, oil, baking powder, and vanilla. Beat with an electric mixer on medium speed until combined, scraping side of bowl occasionally. Gradually beat in as much of the flour as you can with the mixer. Using a wooden spoon, stir in any remaining flour. Divide dough in half. Cover and chill for 2 to 24 hours or until dough is easy to handle.

2. Preheat oven to 375 degrees F. Lightly grease a large cookie sheet; set aside (I didn't grease a cookie sheet but instead lined it with parchment paper). Place demerara sugar in a small bowl. Shape one portion of dough into 1/2-inch balls. Shape the remaining portion of dough into 1-inch balls. Roll balls in demerara sugar to coat generously. Place balls 1 inch apart on prepared cookie sheet. (I did not make two difference sized cookies. I did them all the same size, about 1 inch, which worked great for me.)

3. Bake small cookies in the preheated oven about 8 minutes or until edges are set and tops are dry. Bake large cookies about 10 minutes or until edges are set and tops are dry. Do not overbake cookies. Transfer cookies to a wire rack; let cool. (Cookies will deflate slightly upon cooling.) Makes about about 72 small and 36 large cookies.

4. To Store: Layer cookies between waxed paper in an airtight container; cover. Store at room temperature for up to 3 days or freeze for up to 3 months.

Wednesday, November 11, 2009

Raspberry Crumb Brownie Bars


It seems like all I'm posting lately are sweets, but 'tis the season I suppose!

I've had this recipe for a while but never found an opportunity to make it. But last week we had a small party at work and I thought this would be great to bring in. I'm not usually one to used boxed mixes (cake, brownie, etc.) for anything, but I loved how simple the boxed mix made this recipe. It's a perfect recipe to make when you're in a time crunch. Plus, the boxed mix makes for a super-fudgy brownie which I just love!

Everyone loved these little bars because, let's be honest, who doesn't like chocolate and raspberry?! After I made these I also realized that I'm sure I've had them before, I just don't know where or when. But I knew I liked them so I'm glad I finally found a recipe!

This is a great dessert that is a crowd pleaser and easy to make. Additional, these will be making an appearance on my Christmas Cookie tray this year!

Ingredients
Adapted from The Noshery

1 box of brownie mix and however much oil, eggs and water the box calls for)
2 sticks of butter, room temperature
2 cups flour
1/2 light brown sugar, packed
1/4 tsp. salt
3/4 cup seedless red raspberry jam
1/4 cup shredded coconut

Directions
Preheat oven to 350 degrees, grease and flour a 13x9 baking dish.

In the bowl of a stand mixer fitted with the paddle attachment, cream the butter until light in color. Next add in sugar until combined. Slowly add in flour and salt just until combined and still crumbly.

Add half of this mixture into your greased baking dish and, with your fingers, push down the dough until it completely covers the bottom and a little ways up the sides. Place into preheated oven for 10 minutes.

White the crust is baking, make the brownies in a large bowl according to package directions.

In a small microwave safe bowl, add raspberry jam and melt in the microwave at 30 second intervals (stirring each time) until very smooth.

Remove the crust from the oven after 10 minutes. Pour brownie batter over crust, and sprinkle remaining crust over the brownies. Drizzle with melted raspberry jam and top with coconut.

Put back in oven and bake for 35-40 minutes or until brownie is completely cooked.

Thursday, November 5, 2009

No Bake Chocolate Peanut Butter Bars


If you are looking for the easiest dessert on the planet, look no further.

I had to make a sweet treat for a work party, but the night before I was SO busy and knew I wouldn't have time to make much. So I found this recipe online and thought it looked like a great, easy dessert. And it was. It only took about 15 minutes to make and what I liked was that it made enough to serve a decent size crowd (or a really hungry small crowd, like my office!). This ended up being a treat that everyone loved and one that I will definitely make again!

So if you are in a hurry and want to make something quick, this is a great recipe to try.

Ingredients
Source: Nestle Toll House

2 cups peanut butter, divided
3/4 cup (1 1/2 sticks) butter, softened
2 cups powdered sugar, divided
3 cups graham cracker crumbs (next time I would use 2 1/2 cups, my bars ended up being a little crumbly)
2 cups (12-oz. pkg.) Nestle Toll House Semi-Sweet Mini Chocolate Chips, divided

Directions

Grease a 13 x 9-inch baking pan.

Beat 1 1/4 cups peanut butter and butter in large mixer bowl until creamy. Gradually beat in 1 cup powdered sugar. With hands or wooden spoon, work in remaining 1 cup powdered sugar, graham cracker crumbs and 1/2 cup morsels. Press evenly into prepared baking pan. Smooth top with spatula.

Melt remaining 3/4 cup peanut butter and remaining 1 1/2 cups morsels in a bowl over a double boiler. Stir constantly, until smooth. Spread over graham cracker crust in pan. Refrigerate for at least 1 hour or until chocolate is firm. Cut into bars. Store in covered container in refrigerator.

Saturday, July 11, 2009

"World's Best Chocolate Chip Cookies"


I printed this recipe out last year after a super-original google search entitled "World's Best Chocolate Chip Cookies". I mean, everyone is on the hunt for the best chocolate chip cookies right?! Well if you're not, I sure am. Since then, this recipe has been my go-to chocolate chip cookie recipe. Do I think that they are the world's best? The verdict is still out. I think that they are very good, but I'm hesitant to give them the "world's best chocolate chip cookie" title. But until (or, if) I find a recipe that is better, this is a great go-to recipe that results in one fantasticly chocolatey, chewy, soft and delicious cookie...and they always get major compliments!

So let me know what you think! Try these and report back. Are they really the world's best? Do you have a better recipe? Am I searching for a chocolate chip cookie recipe that simply doesn't exist because these truly are the best thing on earth?! Let me know!

And in the meantime, grab a nice cold glass of milk, a soft cookie (or 2...or 3...) and enjoy!

Ingredients
Source: Recipe Zaar

3/4 cup white sugar
1 cup firmly packed brown sugar
1 cup butter, softened
1 tablespoon pure vanilla extract
2 large eggs, slightly beaten
3 cups all purpose flour
3/4 tsp. baking soda
3/4 tsp. salt
3 cups semi sweet chocolate chips
Directions
Preheat oven to 350 degrees. Cream sugars and butter until light and fluffy. Add vanilla and eggs and mix well. Combine dry ingredients together and gradually add to creamed mixture. Stir in chips. Drop dough by the spoonfull on to an ungreased cookie sheet, about 2" apart. Bake for 10 - 12 minutes.

Tuesday, May 19, 2009

Chocolate Chip Banana Bread


This was by far the best banana bread I've had. There. I said it.

In all seriousness though, this bread was SO moist, flavorful, and the addition of the chocolate was absolutely fantastic. I am a chocolate lover though, so anywhere you want to put in some chocolate is OK by me!

I'm not the only one who thought this bread was great though; my husband and co workers devoured it! In fact, I had one coworker who described it as a "banana cake" rather then a banana bread, and I have to say I agree with him. While it certainly wasn't overly sweet, the texture just reminded you of a delicious cake!

I followed the recipe exactly, which obviously worked well and came out great. Next time I might use 1/2 butter and 1/2 shortening, just to see what it does to the flavor (and because I hate using shortening) but really this is just a great recipe as is. Definitely a keeper and a perfect way to use your overly ripened bananas!

Ingredients
Source: AllRecipes.com

1 cup shortening
2 cups white sugar
2 eggs
2 tablespoons mayonnaise (I used light mayo which worked fine!)
6 very ripe bananas, mashed
3 cups all-purpose flour
1/2 teaspoon salt
1 teaspoon baking powder
2 teaspoons baking soda
1 cup semi-sweet chocolate chips
1/2 cup chopped walnuts (I omitted)

Directions

Preheat oven to 350 degrees F (175 degrees C). Lightly grease two 9x5 inch loaf pans.

In a large bowl, cream together the shortening and sugar until light and fluffy. Stir in the eggs one at a time, beating well with each addition. Stir in the mayonnaise and bananas. Stir together the flour, salt, baking powder and baking soda. Blend the flour mixture into the banana mixture; stir just enough to evenly combine. Fold in the chocolate chips and walnuts.

Bake at 350 degrees F (175 degrees C) until a toothpick inserted into the center of the loaf comes out clean, about 50 to 75 minutes. Cool loaf in the pan for 20 minutes before removing to a wire rack to cool completely.

Saturday, April 11, 2009

Easter Brownies


Rich and fudgy brownies are decorated with buttercream icing and a whopper "egg" to turn a traditional brownie into a sweet Easter treat.

Ingredients
Source: Martha Stewart

1/2 cup (1 stick) unsalted butter, plus more for pan
8 ounces bittersweet chocolate, coarsely chopped
1 1/2 cups sugar
4 large eggs
1 teaspoon pure vanilla extract
3/4 cup all-purpose flour
1/2 teaspoon salt

Directions
  1. Preheat oven to 350 degrees. Butter an 8-inch square baking pan or heatproof glass dish. Line pan with parchment paper, leaving a 1-inch overhang on 2 sides. Set aside. Place butter and chocolate in a large heatproof bowl set over (but not touching) simmering water; stir frequently until chocolate and butter are melted, about 7 minutes. Remove bowl from heat; let cool to room temperature, 10 to 15 minutes.
  2. Stir sugar into cooled chocolate mixture until combined. Whisk in eggs one at a time, whisking until smooth after each addition. Whisk in vanilla. Gently fold in flour and salt.
  3. Pour batter into prepared pan, and smooth top with an offset spatula. Bake until cake tester inserted in the center comes out with only a few moist crumbs attached, 40 to 45 minutes. Transfer pan to a wire rack to cool completely.
  4. Run a knife or offset spatula around the edges of the pan. Using parchment, lift brownies out of pan and onto the rack. Transfer to a cutting board; cut into 2-inch squares. Brownies can be kept in an airtight container at room temperature for up to 3 days.
 

blogger templates | Make Money Online